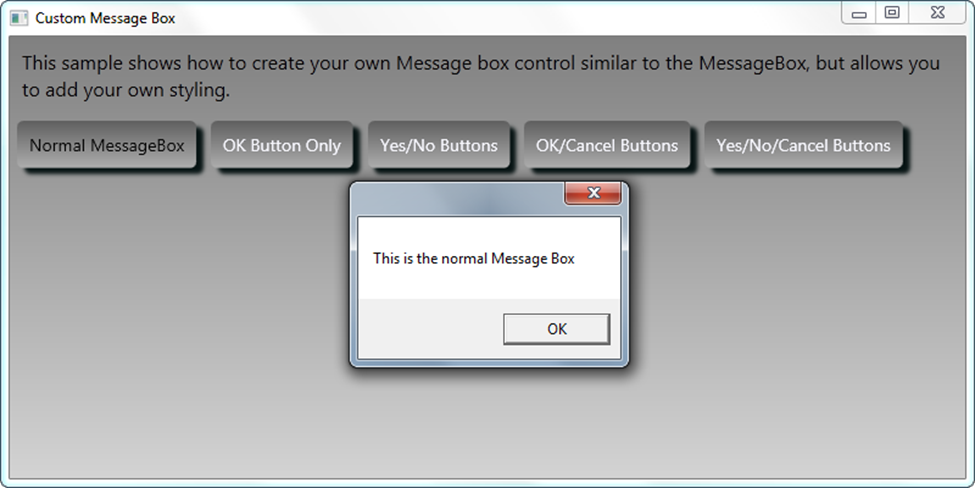
You go to great pains to add styles, colors, gradients, and a really cool look and feel to your WPF application only to have that ruined by the standard Windows message box as shown in Figure 1.

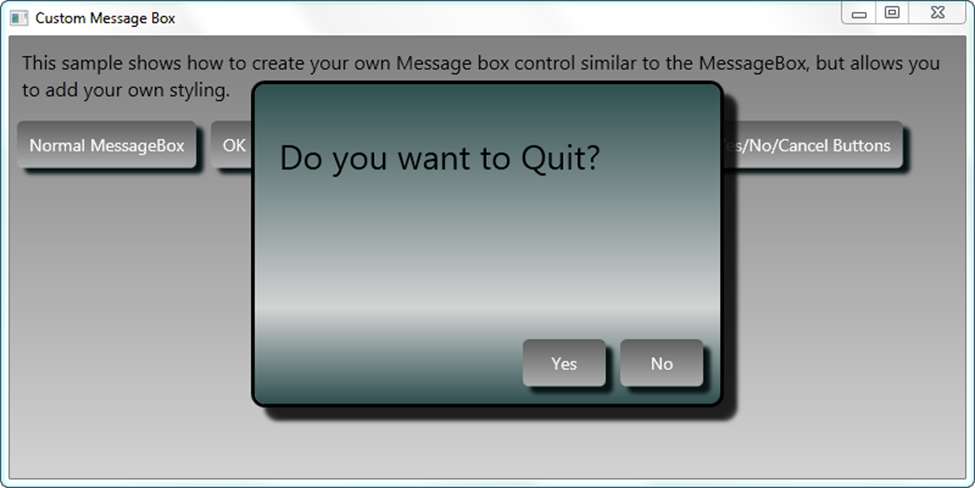
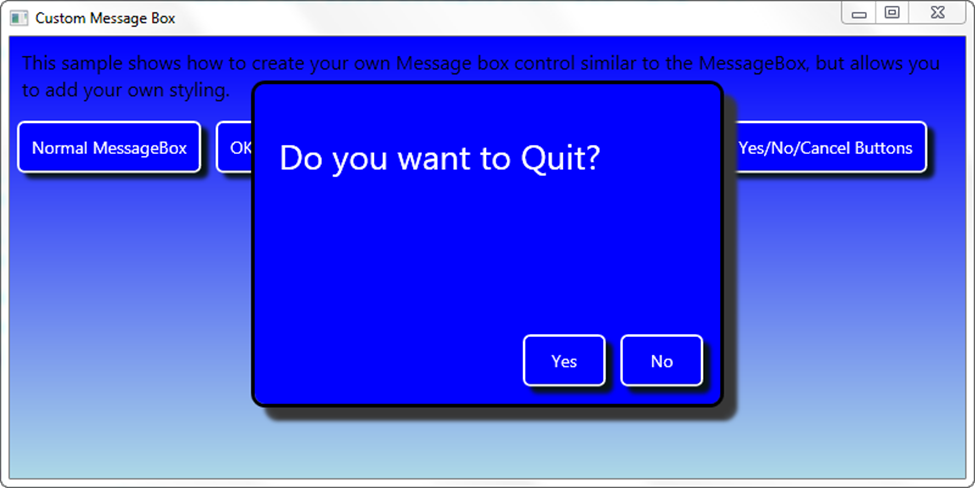
What would be nice is if Microsoft offered a styled message box. But, they don’t. So it is up to us to create a window that we can style and do whatever we want with it. Thus, I can up with a message box that looks like Figure 2 and Figure 3.


The PDSAMessageBoxView XAML
The first step in creating a custom message box is to add a new Window to your WPF project. You then need to set some styles to get a border-less window. You set the following attributes on your Window.
- WindowStyle="None"
- ShowInTaskbar="True"
- ResizeMode=”NoResize”
- AllowsTransparency="True"
- Background="Transparent"
The WindowStyle attribute normally allows you to set a single border, three-D border, or a Tool Window border. Setting this attribute to None will eliminate the border. The ShowInTaskbar attribute is optional, but if you are doing a dialog window you probably want this window to show up in the Task Bar. Since this is a dialog window, you probably do not want to allow the user to resize this window, thus you set the ResizeMode to “NoResize”. The next two attributes, AllowsTransparency and Background work together. You must set AllowsTransparency to True to allow the Background to be set to Transparent. If you do not set these two attributes, then your border will still show up.
The listing that follows shows the complete XAML for the PDSAMessageBoxView.xaml file. This XAML file contains a Border, a Grid, a TextBlock for the message, and a StackPanel control with four PDSAucButton controls (see my previous blog post on how to create these buttons). All of the attributes for the border, the text block and the buttons are controlled via styles in a Resource Dictionary file. Using a resource dictionary allows you to create new resource dictionaries with different colors and other attributes to style the message box in any manner you see fit.
<Window x:Class="PDSA.WPF.PDSAMessageBoxView"
        ...
        xmlns:my="clr-namespace:PDSA.WPF"
        WindowStyle="None"
        AllowsTransparency="True"
        Background="Transparent"
        ResizeMode="NoResize"
        ShowInTaskbar="True"
        FontFamily="Segoe UI"
        WindowStartupLocation="CenterScreen"
        Height="300"
        Width="420"
        MouseLeftButtonDown="Window_MouseLeftButtonDown"
        Deactivated="Window_Deactivated" >
  <Window.Resources>
    <!-- Set style for PDSA Button -->
    <Style TargetType="my:PDSAucButton">
      <Setter Property="Effect"
       Value="{StaticResource pdsaMessageBoxButtonShadow}" />
      <Setter Property="Width"
              Value="80" />
    </Style>
  </Window.Resources>
  <Border Style="{StaticResource pdsaMessageBoxBorder}">
    <Grid>
      <Grid.RowDefinitions>
        <RowDefinition Height="*" />
        <RowDefinition Height="Auto" />
      </Grid.RowDefinitions>
      <TextBlock Name="tbMessage"
         Style="{StaticResource pdsaMessageBoxTextBlock}"
         Text="Message goes here..."
         TextWrapping="Wrap" />
      <StackPanel Grid.Row="1"
          Style="{StaticResource pdsaMessageBoxStackPanel}">
        <my:PDSAucButton Text="Yes"
                         x:Name="btnYes"
                         Click="btnYes_Click" />
        <my:PDSAucButton Text="No"
                         x:Name="btnNo"
                         Click="btnNo_Click" />
        <my:PDSAucButton Text="OK"
                         x:Name="btnOk"
                         Click="btnOk_Click" />
        <my:PDSAucButton Text="Cancel"
                         x:Name="btnCancel"
                         Click="btnCancel_Click" />
      </StackPanel>
    </Grid>
  </Border>
</Window>
Styles for PDSAMessageBox Class
As mentioned previously, all of the styles for the PDSAMessageBoxView class are contained within a resource dictionary. There is one resource dictionary in the PDSA.WPF DLL where the PDSAMessageBoxView class is located. However, there is an additional resource dictionary in the main project with a blue theme as shown in Figure 3. The listing below is the complete resource dictionary for the gray message box theme.
<ResourceDictionary ... >
  <!-- Background for Message Box -->
  <LinearGradientBrush x:Key="pdsaMessageBoxBackground"
                       StartPoint="0.5,0"
                       EndPoint="0.5,1">
    <GradientStop Color="DarkSlateGray"
                  Offset="0" />
    <GradientStop Color="LightGray"
                  Offset="0.70" />
    <GradientStop Color="DarkSlateGray"
                  Offset="1" />
  </LinearGradientBrush>
  <!-- Drop Shadow Effect for Message Box -->
  <DropShadowEffect Color="Black"
                    x:Key="pdsaMessageBoxDropShadow"
                    Opacity=".85"
                    ShadowDepth="16" />
  <!-- Drop Shadow for Message Box Buttons -->
  <DropShadowEffect x:Key="pdsaMessageBoxButtonShadow"
                    Color="Black"
                    ShadowDepth="8" />
  <!-- Border for Message Box -->
  <Style TargetType="Border"
         x:Key="pdsaMessageBoxBorder">
    <Setter Property="CornerRadius"
            Value="10" />
    <Setter Property="BorderBrush"
            Value="Black" />
    <Setter Property="BorderThickness"
            Value="3" />
    <Setter Property="Margin"
            Value="16" />
    <Setter Property="Effect"
        Value="{StaticResource pdsaMessageBoxDropShadow}" />
    <Setter Property="Background"
        Value="{StaticResource pdsaMessageBoxBackground}" />
  </Style>
  <!-- Buttons for Message Box -->
  <Style TargetType="Button"
         x:Key="pdsaMessageBoxButton">
    <Setter Property="Margin"
            Value="10" />
    <Setter Property="Width"
            Value="70" />
    <Setter Property="Height"
            Value="35" />
    <Setter Property="FontSize"
            Value="14" />
    <Setter Property="FontWeight"
            Value="SemiBold" />
    <Setter Property="Effect"
       Value="{StaticResource pdsaMessageBoxButtonShadow}" />
  </Style>
  <!-- Text Block for Message Box -->
  <Style TargetType="TextBlock"
         x:Key="pdsaMessageBoxTextBlock">
    <Setter Property="Foreground"
            Value="Black" />
    <Setter Property="Margin"
            Value="20,40,20,10" />
    <Setter Property="FontSize"
            Value="28" />
    <Setter Property="TextWrapping"
            Value="Wrap" />
  </Style>
  <!-- StackPanel for Message Box -->
  <Style TargetType="StackPanel"
         x:Key="pdsaMessageBoxStackPanel">
    <Setter Property="Orientation"
            Value="Horizontal" />
    <Setter Property="HorizontalAlignment"
            Value="Right" />
    <Setter Property="Margin"
            Value="8" />
  </Style>
</ResourceDictionary>
Feel free to modify any of the above styles to make the message box look like however you want.
The PDSAMessageBox Class
Just like .NET has the MessageBox class in order to display the dialog, I have created a PDSAMessageBox class with a Show method as well. I made the Show method with the same parameters as the MessageBox class in order to help you make an easier transition to the PDSAMessageBox class. However, I do not use any of the MessageBoxImage parameters, so you will need to remove any of these, or add an image to this view if you so desire. Below is the PDSAMessageBox class with the static Show methods defined.
public class PDSAMessageBox
{
  public static MessageBoxResult Show(string message)
  {
    return Show(message, string.Empty, MessageBoxButton.OK);
  }

  public static MessageBoxResult Show(string message,
    string caption)
  {
    return Show(message, caption, MessageBoxButton.OK);
  }

  public static MessageBoxResult Show(string message,
    string caption, MessageBoxButton buttons)
  {
    MessageBoxResult result = MessageBoxResult.None;
    PDSAMessageBoxView dialog = new PDSAMessageBoxView();

    dialog.Title = caption;
    dialog.tbMessage.Text = message;
    dialog.Buttons = buttons;
    // If just an OK button, allow the user to just
    // move away from the dialog
    if (buttons == MessageBoxButton.OK)
      dialog.Show();
    else
    {
      dialog.ShowDialog();
      result = dialog.Result;
    }

    return result;
  }
}
All of the Show methods end up calling just a single Show that takes care of displaying the PDSAMessageBoxView dialog. One thing I did change in my Show method is that if the user pops up a message box with just an “Ok” button, I do allow the user to navigate away from this dialog without pressing the Ok button. To me, it does not make sense to force the user to press a single button on the form. This could have side-effects however, if you have code immediately following the call to the Show method because this is no longer a modal dialog. Again, feel free to modify this code if you do not like this functionality.
Calling the PDSAMessageBox
Below is an example of calling the PDSAMessageBox. The Show method will return a MessageBoxResult enumeration. There was no need to change the return value from that of the normal MessageBox class. This code can be found in the sample that you download along with this blog post.
private void btnOKOnly_Click(object sender, RoutedEventArgs e)
{
  PDSAMessageBox.Show("This just displays an OK Button",
     "OK", MessageBoxButton.OK);
}

private void btnYesNo_Click(object sender, RoutedEventArgs e)
{
  MessageBoxResult result;

  result = PDSAMessageBox.Show("Do you want to Quit?",
      "Quit?", MessageBoxButton.YesNo);

  MessageBox.Show("Result is " + result.ToString());
}
Summary
Creating your own dialog box is very easy using just a little bit of XAML, some styles and a class with a few methods. Break up your styles into resource dictionaries in order to have the flexibility to modify the look and feel of your dialogs. Keep your dialog boxes and buttons in a separate DLL in order to make it easy to reuse your controls.
NOTE: You can download the sample code for this article by visiting my website at http://www.pdsa.com/downloads. Select “Tips & Tricks”, then select “A WPF Message Box you can Style” from the drop down list.
#wpf #styles #messagebox #ui #pauldsheriff #development #programming