In part 1 of this blog post series, you learned how to style the HTML file upload control and how to upload a file to the server. In this post you are going to see how to upload a couple pieces of additional information with the file using a view model class. You are going to start out using a very simple view model class just so you get the basics down. Then you use a file upload base view model class and inherit from this class to upload a file and copy it to the file system on the web server. This prepares you to inherit from this base class later and store the uploaded file to a database, the cloud, or some other data store.
Starting with a Simple View Model Class
Create a new project using Visual Studio 2022 using the ASP.NET Core Web App (Model-View-Controller) template. Name the new project UploadVMSample. Once you have the new project created, open the Views\Home\Index.cshtml file and replace all the code in this file with the code shown in Listing 1. You are going to create two samples as you follow along with this blog post.
@{
  ViewData["Title"] = "File Upload Using View Model";
}

<div class="mt-4 row">
  <div class="col text-center">
    <h1>File Upload Using View Model</h1>
  </div>
</div>

<div class="mt-4 row justify-content-center">
  <div class="list-group col-5">
    <a asp-action="Sample1"
       asp-controller="Home"
       class="list-group-item">
      Simple View Model
    </a>
    <a asp-action="Sample2"
       asp-controller="Home"
       class="list-group-item">
      A Better View Model
    </a>
  </div>
</div>
Listing 1: Create the home page to call two samples.
Create a File Information Entity Class
Right mouse-click on the project and create a new folder named EntityClasses. Right mouse-click on the EntityClasses folder and create a new class name FileInformation.cs. Replace the template code in this new file with the code shown in Listing 2. This entity class holds two additional pieces of information (Title and Description) about the file you are uploading to the server, as well as data about the file uploaded such as the type, the length and the file name.
using System.ComponentModel.DataAnnotations;

namespace UploadVMSample.EntityClasses;

public class FileInformation
{
  public FileInformation()
  {
    Title = string.Empty;
    Description = string.Empty;
    FileName = string.Empty;
    Type = string.Empty;
    ServerLocation = string.Empty;
  }

  [Display(Name = "Enter Title for File")]
  public string Title { get; set; }
  [Display(Name = "Enter Description for File")]
  public string Description { get; set; }

  public string FileName { get; set; }
  public long Length { get; set; }
  public string Type { get; set; }
  public string ServerLocation { get; set; }
}
Listing 2: Create a file information entity class to just hold file data.
Create a Simple View Model
I like having a view model class associated with each page in my MVC application. Right mouse-click on the project and create a new folder named ViewModelClasses. Right mouse-click on the ViewModelClasses folder and create a new class name Sample1ViewModel.cs. Replace the template code in this new file with the code shown in Listing 3.
This view model class has a property of the type FileInformation you just created, and in addition has a property of the type IFormFile to which you will bind the file upload control on your MVC page. You have three methods in this class; Save(), GetFileProperties(), and SaveToDataStore(). The only public method is Save() and it is this method you call from the controller. The GetFileProperties() method sets the properties in the entity class by getting the data from the uploaded file. The SaveToDataStore() method is responsible for saving the file to a location on your web server.
using System.ComponentModel.DataAnnotations;
using UploadVMSample.EntityClasses;

namespace UploadVMSample.ViewModelClasses;

public class Sample1ViewModel
{
  public FileInformation FileInfo { get; set; } = new();
  [Display(Name = "Select File to Upload")]
  public IFormFile? FileToUpload { get; set; }

  public async Task<bool> Save()
  {
    bool ret = false;

    // Ensure user selected a file for upload
    if (FileToUpload != null && FileToUpload.Length > 0) {
      // Get all File Properties
      GetFileProperties();

      // Save File to Data Store
      ret = await SaveToDataStore();
    }

    return ret;
  }

  protected void GetFileProperties()
  {
    if (FileToUpload != null) {
      // Get the file name
      FileInfo.FileName = FileToUpload.FileName;
      // Get the file's length
      FileInfo.Length = FileToUpload.Length;
      // Get the file's type
      FileInfo.Type = FileToUpload.ContentType;
    }
  }

  // Override to save to a data store
  protected async Task<bool> SaveToDataStore()
  {
    bool ret = false;

    if (FileToUpload != null) {
      // Set Server Location to Store File
      FileInfo.ServerLocation = Path.GetTempPath();
      // Add the file name to the path
      FileInfo.ServerLocation += FileInfo.FileName;

      // Create a stream to write the file to
      using var stream = System.IO.File.Create(FileInfo.ServerLocation);
      // Upload file and copy to the stream
      await FileToUpload.CopyToAsync(stream);

      ret = true;
    }

    return ret;
  }
}
Listing 3: Create a view model to hold the file information being uploaded.
Create a Page to Test Simple View Model
Let's now create the page to test out our simple view model and entity classes that we just created. Right mouse-click on the Views\Home folder and add a new view named Sample1.cshtml. Replace the template code in this new file with the code shown in Listing 4 which creates a page that looks like Figure 1.
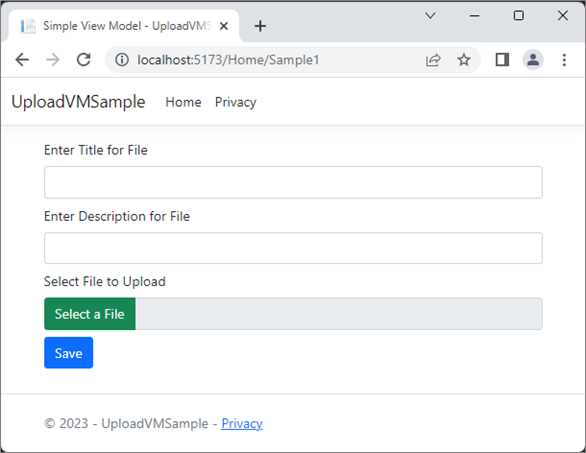
The first line informs the Razor engine the class to expect to be passed into this page from the controller. In this case it is the Sample1ViewModel class you just created. Map each property you wish to collect from the user to the properties in the FileInformation class and to the FileToUpload property in the view model. It is important to set the enctype attribute on the <form> element to be "multipart/form-data". This allows you to post the file information to the controller to upload. The Save button at the bottom of the page is what causes the form to post back to the [HttpPost] method Sample1() in the HomeController.
@model UploadVMSample.ViewModelClasses.Sample1ViewModel

@{
  ViewData["Title"] = "Simple View Model";
}

<form method="post" enctype="multipart/form-data">
  <div class="mb-2">
    <label asp-for="FileInfo.Title" class="form-label"></label>
    <input asp-for="FileInfo.Title" class="form-control" />
  </div>
  <div class="mb-2">
    <label asp-for="FileInfo.Description" class="form-label"></label>
    <input asp-for="FileInfo.Description" class="form-control" />
  </div>
  <div class="mb-2">
    <label asp-for="FileToUpload" class="form-label"></label>
    <input asp-for="FileToUpload"
           type="file" class="d-none" />
    <div class="input-group">
      <button class="input-group-text btn btn-success"
              type="button"
              onclick="selectFileClick();">
        Select a File
      </button>
      <input id="fileDisplay" type="text"
             class="form-control" readonly="readonly"
             onclick="selectFileClick();" />
    </div>
  </div>
  <div class="mb-2">
    <button class="btn btn-primary">Save</button>
  </div>
</form>

@section Scripts {
  <script>
    $(document).on('change', ':file', function (e) {
      $("#fileDisplay").val(e.target.value);
    });

    function selectFileClick() {
      $("#FileToUpload").trigger("click");
    }
  </script>
}
Listing 4: Bind the inputs on the page to the properties in the view model class.
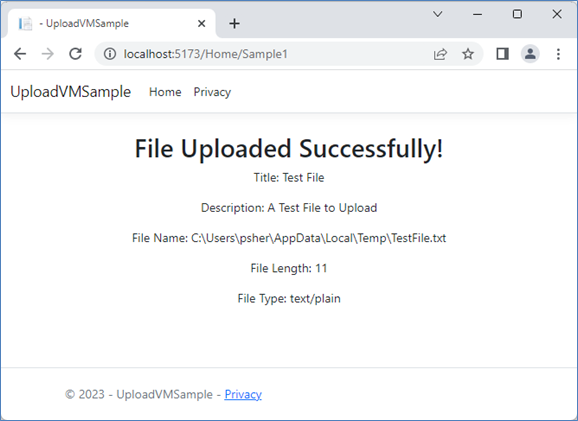
Right mouse-click on the Views\Home folder and add a new view named Sample1Complete.cshtml. Replace the template code in this new file with the code shown in Listing 5. This code displays the information for the file that was uploaded so the user knows that the upload process was successful.
@model UploadVMSample.ViewModelClasses.Sample1ViewModel

<div class="mt-4 row">
  <div class="col text-center">
    <h1>File Uploaded Successfully!</h1>

    <p>Title: @Model.FileInfo.Title</p>
    <p>Description: @Model.FileInfo.Description</p>
    <p>File Name: @Model.FileInfo.ServerLocation</p>
    <p>File Length: @Model.FileInfo.Length</p>
    <p>File Type: @Model.FileInfo.Type</p>
  </div>
</div>
Listing 5: Create page to display the results from uploading the file.
Write the Controller Methods
You now need two methods to display and to post this page. Open the Controllers\HomeController.cs file and add two new action methods to this class as shown in Listing 6. The Sample1() get method creates an instance of the Sample1ViewModel class, which in turn, creates an instance of the FileInformation object in the property FileInfo. This is what is then bound to the input fields on the page and the data input is then posted to the Sample1() post method.
public IActionResult Sample1()
{
  Sample1ViewModel vm = new();

  return View(vm);
}

[HttpPost]
public async Task<IActionResult> Sample1(Sample1ViewModel vm)
{
  bool ret = await vm.Save();

  if (ret) {
    return View("Sample1Complete", vm);
  }
  else {
    return View(vm);
  }
}
Listing 6: Write the appropriate code in the controller to call your view model sample.
When the user fills in the Title, the Description, and the FileToUpload, this information is mapped automatically by ASP.NET into the Sample1ViewModel instance. Call the Save() method on the Sample1ViewModel object to gather the file information and to write the file to the temp folder on your computer. In a production application, you would specify the name of the folder to write to in your appsettings.json file, I am just using the temp folder to illustrate the process.
Try it Out
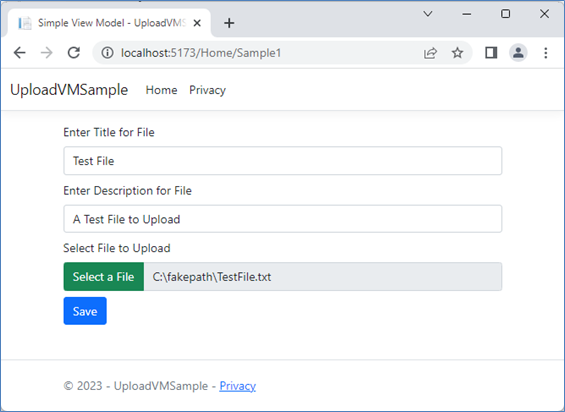
Run the MVC application and click on the Simple View Model link on the home page. You should see a page that looks like Figure 1. Fill in some data into the two fields Title and Description. Select a file from your local hard drive and click the Save button as shown in Figure 2.
After you click the Save button, you should see a page that looks like Figure 3.
Create a Better View Model
The very simple view model class you created in the last sample was a good introduction to using a view model with an MVC page. However, we can make this class reusable and extensible by creating an abstract base view model class. The SaveToDataStore() method should be an abstract method so you can override the method in a derived class to store the uploaded file on the web server, in a database, in the cloud, or any other location you wish. Right mouse-click on the ViewModelClasses folder and create a new class named FileUploadViewModelBase.cs. Replace the template code in this new file with the code shown in Listing 7.
using System.ComponentModel.DataAnnotations;
using UploadVMSample.EntityClasses;

namespace UploadVMSample.ViewModelClasses;

public abstract class FileUploadViewModelBase
{
  public FileInformation FileInfo { get; set; } = new();
  [Display(Name = "Select File to Upload")]
  [Required(ErrorMessage = "Enter a File to Upload")]
  public IFormFile? FileToUpload { get; set; }
  public string ErrorMessage { get; set; } = string.Empty;

  public virtual async Task<bool> Save()
  {
    bool ret = false;

    // Ensure user selected a file for upload
    if (FileToUpload != null && FileToUpload.Length > 0) {
      // Get all File Properties
      GetFileProperties();

      // Save File to Data Store
      ret = await SaveToDataStoreAsync();
    }
    else {
      ErrorMessage = "No File Specified for Uploading";
    }

    return ret;
  }

  protected virtual void GetFileProperties()
  {
    if (FileToUpload != null) {
      // Get the file name
      FileInfo.FileName = FileToUpload.FileName;
      // Get the file's length
      FileInfo.Length = FileToUpload.Length;
      // Get the file's type
      FileInfo.Type = FileToUpload.ContentType;
    }
  }

  // Override to save to a data store
  protected abstract Task<bool> SaveToDataStoreAsync();
}
Listing 8: Inherit from the FileUploadViewModelBase class and override the SaveToDataStore() method.
Wrap File Information Inputs into a Bootstrap Card
To make the UI a little more interesting, let's wrap all the inputs into a Bootstrap 5.x card. A card provides a box around the inputs as well as a header and footer area as shown in Figure 4.
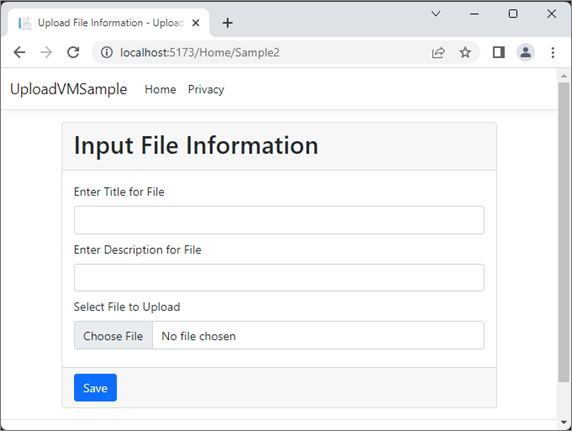
To create this MVC page, right mouse-click on the Views\Home folder and add a new view named Sample2.cshtml. Replace the template code in this new file with the code shown in Listing 9. This page accepts the FileSystemViewModel class as its model. The inputs are the same as you created previously, but they are placed into an additional <div> element with the class attribute set to "card-body".
namespace UploadVMSample.ViewModelClasses;

public class FileSystemViewModel : FileUploadViewModelBase
{
  /// <summary>
  /// Save to Server File System
  /// </summary>
  /// <returns>A Task with true=successful, false=unsuccessful</returns>
  protected override async Task<bool> SaveToDataStoreAsnc()
  {
    bool ret = false;

    if (FileToUpload != null) {
      // Set Server Location to Store File
      FileInfo.ServerLocation = Path.GetTempPath();
      // Add the file name to the path
      FileInfo.ServerLocation += FileInfo.FileName;

      // Create a stream to write the file to
      using var stream = File.Create(FileInfo.ServerLocation);
      // Upload file and copy to the stream
      await FileToUpload.CopyToAsync(stream);

      ret = true;
    }

    return ret;
  }
}
Listing 9: Wrap up the file information to upload within a Bootstrap card and add validation.
Create Page to Display File Upload Results
Right mouse-click on the Views\Home folder and add a new view named FileUploadComplete.cshtml. Replace the template code in this new file with the code shown in Listing 10. This code is just like the other completion page you created, just the model has changed to the FileUploadViewModelBase class.
@model UploadVMSample.ViewModelClasses.FileUploadViewModelBase

<div class=i"mt-4 row">
  <div class="col text-center">
    <h1>File Uploaded Successfully!</h1>

    <p>Title: @Model.FileInfo.Title</p>
    <p>Description: @Model.FileInfo.Description</p>
    <p>File Name: @Model.FileInfo.ServerLocation</p>
    <p>File Length: @Model.FileInfo.Length</p>
    <p>File Type: @Model.FileInfo.Type</p>
  </div>
</div>
Listing 10: Use the view model base class to display the results of uploading a file.
Write Controller Methods
Create the code to call the new Sample2.cshtml page by opening the Controllers\HomeController.cs file and adding two new action methods as shown in Listing 11. Notice that the post method is marked as asynchronous so you can call the asynchronous methods in the view model. You are also checking the ModelState object to ensure that the required fields are all filled in.
public IActionResult Sample2()
{
  FileSystemViewModel vm = new();

  return View(vm);
}

[HttpPost]
public async Task<IActionResult> Sample2(FileSystemViewModel vm)
{
  if (ModelState.IsValid) {
    if (await vm.Save()) {
      return View("FileUploadComplete", vm);
    }
  }

  return View(vm);
}
Listing 11: Create the asynchronous methods in the controller to save the file uploaded to disk.
Try it Out
Run the MVC application and click on the A Better View Model link on the home page. Enter some data like you did previously and click the Save button. You should see a completion page just like you did before.
Summary
In this blog post you learned to upload a file and additional file information using an entity class and a view model class. You wrapped up the inputs into a Bootstrap card control and you created a reusable base class. In addition, you wrote asynchronous methods to save the file, thus making your code more scalable.
#fileupload #javascript #csharp #mvc #dotnetcore #pauldsheriff #development #programming