Asynchronous JavaScript And XML (Ajax) is the cornerstone of communication between your client-side and server-side code. Regardless of whether you use JavaScript, jQuery, Angular, React or any other client-side language, they all use Ajax under the hood to send and receive data from a web server. Using Ajax you can read data from, or send data to, a web server all without reloading the current web page. In other words, you can manipulate the DOM and the data for the web page without having to perform a post-back to the web server that hosts the web page. Ajax gives you a huge speed benefit because there is less data going back and forth across the internet. Once you learn how to interact with Ajax, you will find the concepts apply to whatever front-end language you use.
In this article you are going to learn to work with Deferred objects in jQuery.
Download Starting Projects
Instead of creating a front-end web server and a .NET Core Web API server in this article I have two sample projects you may download to get started quickly. If you are unfamiliar with building a front-end web server and a .NET Core Web API server, you can build them from scratch step-by-step in my three blog posts listed below.
- Create CRUD Web API in .NET Core
- Create .NET Core MVC Application for Ajax Communication
- Create Node Web Server for Ajax Communication
You can find all three of these blog posts at https://www.pdsa.com/blog. Instructions for getting the samples that you can start with are contained in each blog post. You are going to need blog post #1, then choose the appropriate web server you wish to use for serving web pages; either .NET MVC (#2) or NodeJS (#3).
Start Both Projects
After you have reviewed the blog posts and downloaded the appropriate sample projects to your hard drive, start both projects running. The first project to load is the Web API project. Open the WebAPI folder in VS Code and click on the Run | Start Debugging menus to load and run the .NET Web API project.
Open the AjaxSample folder in VS Code.
If you are using node, open the AjaxSample folder in VS Code, open a Terminal window and type npm install. Then type npm run dev to start the web server running and to have it display the index page in your browser.
If you are using the .NET MVC application, open the AjaxSample-NET folder in VS Code and click on the Run | Start Debugging menus to load and run the .NET MVC project. The index.cshtml page should now be displayed in your browser window.
Try it Out
Go to your browser for the front-end web server (localhost:3000) and you should see a page that looks like Figure 1. If your browser looks like this, everything is working for your front-end web server.
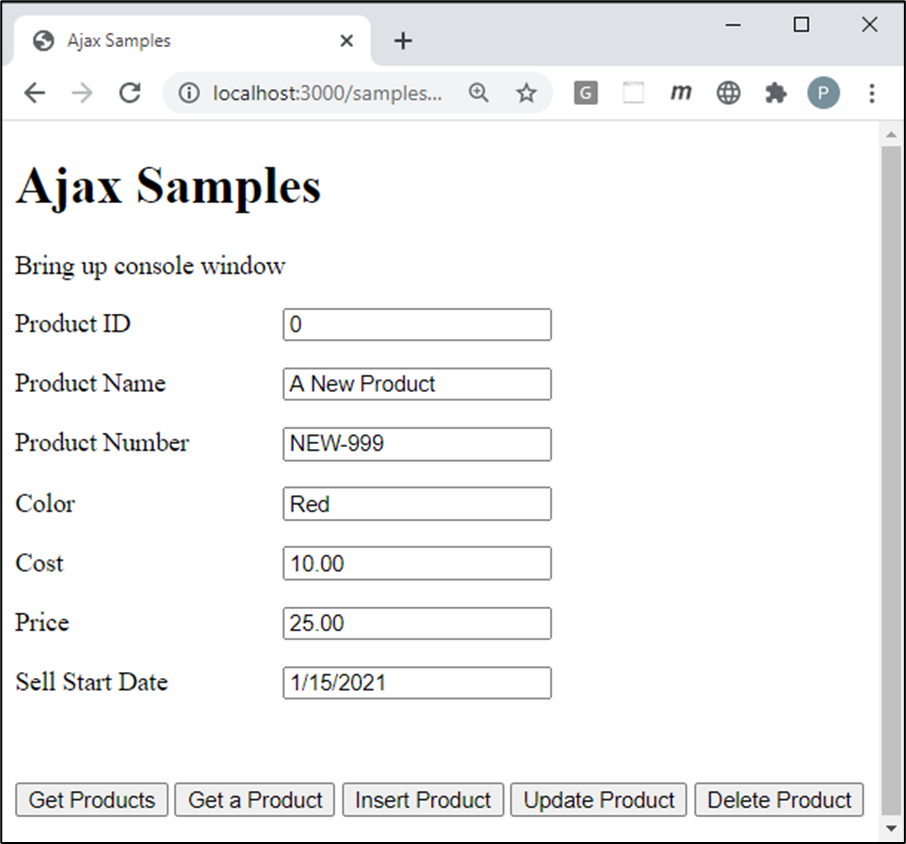
Open the Browser Tools in your browser, usually accomplished by clicking the F12 key. Click the Get Products button and you should see the product data retrieved from the Product table in the AdventureWorksLT database and displayed in your console window.
Install jQuery
If you have not already done so, you need to install jQuery into your node server project. If you are using the MVC application, jQuery is already installed, so you can skip to the next section of this article. Open the Terminal window in VS Code in your node server project and type the following command.
npm install jquery
After jQuery has been installed, open you index page and add a new <script> tag to use jQuery before all other <script> tags on the page.
<script src="/node_modules/jquery/dist/jquery.min.js"></script>
Add Entity Classes to Web API Project
To test out some of the Deferred capabilities, you need a couple more entity and controller classes added to the Web API project. Open the WebAPI folder in VS Code and in the \EntityClasses folder add a new file named ProductCategory.cs. Add the code in Listing 1 into this file.
using System.ComponentModel.DataAnnotations;
using System.ComponentModel.DataAnnotations.Schema;

namespace WebAPI
{
  [Table("ProductCategory", Schema ="SalesLT")]
  public partial class ProductCategory
  {
    /// <summary>
    /// Get/Set ProductCategoryID
    /// </summary>
    [Required]
    [Key]
    [DatabaseGenerated(DatabaseGeneratedOption.Identity)]
    public int ProductCategoryID { get; set; }

    /// <summary>
    /// Get/Set Name
    /// </summary>
    [Required(ErrorMessage = "The Category Name is required")]
    public string Name { get; set; }
  }
}
Next, right mouse-click on the \EntityClasses folder one more time and add a new file named ProductModel.cs. Add the code shown in Listing 2 to this file.
using System.ComponentModel.DataAnnotations;
using System.ComponentModel.DataAnnotations.Schema;

namespace WebAPI
{
  [Table("ProductModel", Schema ="SalesLT")]
  public partial class ProductModel
  {
    /// <summary>
    /// Get/Set ProductModelID
    /// </summary>
    [Required]
    [Key]
    [DatabaseGenerated(DatabaseGeneratedOption.Identity)]
    public int ProductModelID { get; set; }

    /// <summary>
    /// Get/Set Name
    /// </summary>
    [Required(ErrorMessage = "The Model Name is required")]
    public string Name { get; set; }
  }
}
Add Controllers to Web API Project
Create a couple more controllers in your .NET Web API project. Open the WebAPI folder in VS Code and in the \Controllers folder add a new file named ProductCategoryController.cs. Add the code in Listing 3 into this file.
using System;
using System.Collections.Generic;
using System.Linq;
using Microsoft.AspNetCore.Http;
using Microsoft.AspNetCore.Mvc;

namespace WebAPI.Controllers {
  [Route("api/[controller]")]
  [ApiController]
  public class ProductCategoryController : BaseApiController {
    public ProductCategoryController(AdventureWorksLTDbContext context) : base() {
      _DbContext = context;
    }

    private AdventureWorksLTDbContext _DbContext;

    private const string ENTITY_NAME = "categories";

    // GET api/values
    [HttpGet]
    public IActionResult Get() {
      IActionResult ret = null;
      List<ProductCategory> list = new List<ProductCategory>();

      try {
        if (_DbContext.ProductCategories.Count() > 0) {
          // NOTE: Declare 'list' outside the using to avoid it
          // being disposed before it is returned.
          list = _DbContext.ProductCategories.OrderBy(p => p.Name).ToList();
          ret = StatusCode(StatusCodes.Status200OK, list);
        } else {
          ret = StatusCode(StatusCodes.Status404NotFound,
                           "No " + ENTITY_NAME + " exist in the system.");
        }
      } catch (Exception ex) {
        ret = HandleException(ex,
           "Exception trying to get all " + ENTITY_NAME + ".");
      }

      return ret;
    }

    [HttpGet("{id}")]
    public IActionResult Get(int id) {
      IActionResult ret = null;
      ProductCategory entity = null;

      try {
        // Declare 'entity' outside the using to avoid it
        // being disposed before it is returned.
        entity = _DbContext.ProductCategories.Find(id);
        if (entity != null) {
          ret = StatusCode(StatusCodes.Status200OK, entity);
        } else {
          ret = StatusCode(StatusCodes.Status404NotFound,
                   "Can't find Category ID: " + id.ToString() + ".");
        }
      } catch (Exception ex) {
        ret = HandleException(ex,
          "Exception trying to retrieve Category ID: " + id.ToString() + ".");
      }

      return ret;
    }
  }
}
Right mouse-click on the \Controllers folder and add a new file named ProductModelController.cs. Add the code in Listing 4 into this file.
using System;
using System.Collections.Generic;
using System.Linq;
using Microsoft.AspNetCore.Http;
using Microsoft.AspNetCore.Mvc;

namespace WebAPI.Controllers {
  [Route("api/[controller]")]
  [ApiController]
  public class ProductModelController : BaseApiController {
    public ProductModelController(AdventureWorksLTDbContext context) : base() {
      _DbContext = context;
    }

    private AdventureWorksLTDbContext _DbContext;

    private const string ENTITY_NAME = "model";

    // GET api/values
    [HttpGet]
    public IActionResult Get() {
      IActionResult ret = null;
      List<ProductModel> list = new List<ProductModel>();

      try {
        if (_DbContext.ProductModels.Count() > 0) {
          // NOTE: Declare 'list' outside the using to avoid it
          // being disposed before it is returned.
          list = _DbContext.ProductModels.OrderBy(p => p.Name).ToList();
          ret = StatusCode(StatusCodes.Status200OK, list);
        } else {
          ret = StatusCode(StatusCodes.Status404NotFound,
                           "No " + ENTITY_NAME + "s exist in the system.");
        }
      } catch (Exception ex) {
        ret = HandleException(ex,
           "Exception trying to get all " + ENTITY_NAME + "s.");
      }

      return ret;
    }

    [HttpGet("{id}")]
    public IActionResult Get(int id) {
      IActionResult ret = null;
      ProductModel entity = null;

      try {
        // Declare 'entity' outside the using to avoid it
        // being disposed before it is returned.
        entity = _DbContext.ProductModels.Find(id);
        if (entity != null) {
          ret = StatusCode(StatusCodes.Status200OK, entity);
        } else {
          ret = StatusCode(StatusCodes.Status404NotFound,
                   "Can't find Model ID: " + id.ToString() + ".");
        }
      } catch (Exception ex) {
        ret = HandleException(ex,
          "Exception trying to retrieve Model ID: " + id.ToString() + ".");
      }

      return ret;
    }
  }
}
Open the AdventureWorksLTDbContext.cs file and add two new DbSet<> properties to this class.
public virtual DbSet<ProductCategory> ProductCategories { get; set; }
public virtual DbSet<ProductModel> ProductModels { get; set; }
Save all your changes and restart the Web API project debugger so these new classes can be compiled and ready to use.
Deferred Objects
The Deferred object in jQuery is like a Promise in that is a chainable object. After creating a Deferred object you may attach one or many callback functions and respond to the success or failure of the function attached to the Deferred object. A Deferred object is chainable and uses a Promise object but it is a wrapper around a Promise and has its own set of methods.
You are responsible for resolving (fulfilling) or rejecting a Deferred object. If you use the $.ajax() method, it returns a Promise, but some code within the $.ajax() is responsible for fulfilling or rejecting the Promise. This is one of the major differences between a Deferred object and Promise. Just like a Promise, a Deferred object has its own .done(), .fail(), .catch() and .always() methods to check for how the function completed. There are also many other methods you may use with a Deferred object. Check out the full documentation for jQuery Deferred at https://api.jquery.com/category/deferred-object.
Use Cases
There are a few typical use cases for Deferred objects. The common being anywhere you normally use callbacks can be replaced with using a Deferred object. Here is a list of the most common uses of a Deferred object.
- Ajax Calls
- Chain setTimeout() and/or setInterval()
- Respond to HTML animations
- Load resources (images, HTML, etc) from a web server
The Nested Calls Problem
A typical problem you might run into with traditional jQuery and callbacks is when you have several sets of data you must fetch, but you only want to get each succeeding data as long as each previous one was successful. In Listing 5 you see an example of making three $.get() Ajax calls and you only want the next call to happen after the previous call is successful. You can see that if you have many calls that you wish to chain like this that the code can quickly become unreadable.
function theNestingProblem() {
  // Too much nesting for multiple calls
  $.get(URL + "/product", function (data) {
    console.log(data);
    $.get(URL + "/productcategory", function (data) {
      console.log(data);
      $.get(URL + "/productmodel", function (data) {
        console.log(data);
      });
    });
  });
}
The Nested Call Solution
Using a Deferred object can help you eliminate these many layers of nesting. Instead of creating nested calls, create a Deferred object and use the .then() method to chain all calls to each $.get() together. This puts all calls at the same level. This is much more readable and the code stops as soon as one of them raises an exception. Open the index page and add the code shown in Listing 6.
function theNestingSolution() {
  let def = $.Deferred();
  def
    .then(function () {
      return $.get(URL + "/product").done(function (data) {
        console.log(data);
      });
    })
    .then(
      function () {
        return $.get(URL + "/productcategory").done(function (data) {
          console.log(data);
        });
      })
    .then(
      function () {
        return $.get(URL + "/productmodel").done(function (data) {
          console.log(data);
        });
      }
    );

  def.resolve();
}
Try it Out
Open the index page and modify the URL constant so it does not have /product on the end.
const URL = "http://localhost:5000/api";
Locate the row where the buttons are and delete all of them. Then add a new button that looks like the following:
<div class="row">
  <button type="button" onclick="theNestingSolution();">
    Nesting Solution
  </button>
</div>
Save the changes to the index page and go to the browser and click on the The Nesting Solution button. Check the console window to make sure you are getting back three arrays of data.
A Promise-Based Timeout
Using the Deferred object to eliminate nesting of code is one use case. Another case is to eliminate callbacks you normally use with setTimeout(). The code in Listing 7 shows how you normally use setTimeout() function to callback a function after a specified amount of milliseconds.
function setTimeoutCallback() {
  setTimeout(() => {
    console.log('Displayed after one second...');
  }, 1000);
}
Create your own function named timeout() as shown in Listing 8. In this function create a Deferred object and call the resolve() function as the callback to the setTimeout() function's first parameter. The second parameter is the number of milliseconds passed into the timeout() function. Return from this function a Promise object.
function timeout(milliseconds) {
  // Create a new Deferred object
  let def = $.Deferred();

  // Resolve the Deferred after the amount of time
  // specified by the milliseconds passed in
  setTimeout(def.resolve, milliseconds);

  // Return the Deferred's Promise object
  return def.promise();
}
Create a sample function, shown in Listing 9, to try out this new timeout() function. In this code you can now use a .then() method to respond to the success of the call to the setTimeout() function. While this is a simple example, you can see how this makes the code more consistent with other Promise code you use in your web applications today.
function setTimeoutDeferred() {
  timeout(1000).then(() => {
    console.log('Displayed after one second...');
  });
}
Try it Out
Add the code for the three functions shown in Listing 7, Listing 8, and Listing 9 to the index page. Add two buttons to call the two samples as shown below:
<button type="button" onclick="setTimeoutCallback();">
  setTimeout Callback
</button>
<button type="button" onclick="setTimeoutDeferred();">
  setTimeout Deferred
</button>
Save all the changes on the index page and go to the browser and click on each button to see the message displayed in the console window.
Using Deferred Notify Events
The Deferred object has a notify() method you can invoke and pass some data to. This allows you to report on the progress of a function. This could be used to display a progress bar to the user, or maybe just display a counter of how many records have been processed so far. To illustrate howt the notify() method works, add the code shown in Listing 10 to the index page.
function counter(total, notifyOn) {
  // Create a new Deferred object
  let def = $.Deferred();

  let count = 0;
  // Simulate making some call using setInterval()
  let id = setInterval(function () {
    count++;
    if ((count % notifyOn) === 0) {
      def.notify(count);
    }
    if (count === total) {
      def.resolve();
      clearInterval(id);
    }
  }, 1);

  // Return the Deferred's Promise object
  return def.promise();
}
In the code shown in Listing 10, create a Deferred object. Next, create a variable named count and initialize it to a zero value. Use setInterval() to invoke a callback function each one millisecond. Within this callback function, increment the variable count by one and when count reaches the total passed in, call clearInterval() to exit out of the setInterval() function.
Each time the setInterval() fires, you also check to see if the modulus of the count and notifyOn variables is equal to zero. If it is, that is when you invoke the notify() method on the Deferred object. So, for example, if you pass in a 200 to the total variable and a 10 to the notifyOn variable, the callback function in the setInterval() is called 200 times, but only every 10th time will the notify() method be called.
Add a new function named performCounting(), shown in Listing 11, to the index page to call this counter function and report on the progress. In this function you call counter() and get the Promise object returned. You then connect to the .progress() method to report on the progress and to the .then() function to display a message once the counting is finished.
function performCounting() {
  // Get promise from the counter() function
  let promise = counter(200, 10);

  // Connect to the progress() method
  promise.progress(function (data) {
    console.log(data);
  });

  // Connect to the done() method
  // Could also use the then() method
  promise.done(function () {
    console.log('Finished Counting');
  });
}
Try it Out
Add the code shown in Listing 10 and Listing 11 to the index page. Add a new button as shown below:
<button type="button" onclick="performCounting();">
  Notify Event
</button>
Save the changes to the index page, go to the browser and click on the Notify Event button to see the reporting happen in the console window.
Summary
In this article you learned about the jQuery Deferred object. This object is a wrapper around a Promise object and supplies some additional methods and functionality. The Deferred object helps you to simplify code and refactor callback functions with Promises. All of this makes your code more readable and chainable.